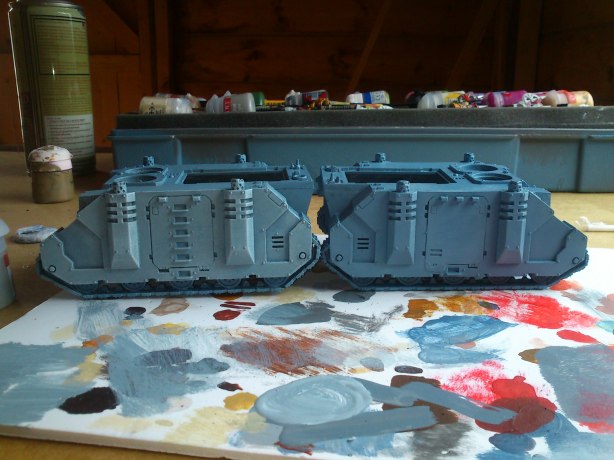
Hey guys! About 2-3 months ago, I went about stripping 2 of my old rhinos, truth be told, it didn’t go fantastic, so I use them for testing techniques and trying out colour schemes.
So today I decided to use one of them to make a tutorial on how drybrushing a Rhino can make life a lot easier when trying to get a nice even cover on your vehicles which doesn’t look too cartoonistic or out of place and instead of adding your own highlights trough a brush, the drybrush effect will do it all for you naturally!
So, to begin with, here are the two rhinos I have, I have basecoated them in Army painters equivalent of Shadow grey, the results are fantastically close
So I took the left Rhino, the one in the worst condition, just because I didn’t want to add too many layers to a rhino that could be saved eventually.
So taking my Games Workshop Citadel paints, using the old range, but you could use the new range if you want, but at this point I haven’t got any of the new greys.
So, being a Space Wolve player, I took my selection of blues and greys, but you can use this technique in your own armies colour scheme.
So, since my model has already been basecoated in shadow grey, I’m going to take 1:1 Shadow grey/russ grey to Codex grey, if your model has been basecoated in the colour of your army, you can skip to the next set, but if you can’t find a coloured primer in the colour of your army, basecoat your model in a dark primer, whether it be black, or grey, it won’t really matter, so long as it’s dark enough to give a natural shadow. You’ll want to follow the steps ahead to basecoat it by drybrushing your base colour over your primer, then repeating it by adding a lighter colour like I have done ahead.
So after mixing my Shadow grey with Codex grey 1:1, I had a colour like this:
So, beginning the drybrush technique, I twirl my brush in the paint and start by removing the excess from the brush somewhere else on my pallete until the paint is just about coming off the brush
 As you can see, as I got to the top, less paint was coming off the brush, you should then start to moving your brush up and down in strokes of about 1-2cm all over the model, I have only done it on one side for demonstration purposes
So we’ve started on our layering, you might have noticed from your drybrushing, it naturally picks up anything that sticks out from the model as well as edges of the model itself.
The second layer will be 1:1 Codex grey to Space Wolve grey
 And after using the drybrush technique on the Rhino with the second layer, mine looked like this:

And as we near closer to the end, you’re going to want to take some straight up Space Wolve grey and drybrush any edges or anywhere you want highlighted, but only lightly, you don’t want it to look un natural
 You will then want to start with some Skull white, picking out the final highlights.
 With your own army, you might want to give the highlights a few more pass’, but for my own army, I was happy with this result.
On its own the drybrushing technique look’s fine, but on you finish your Rhino, it’ll make it look a touch more impressive than the standard basecoat and brush highlights!
 And finally a before and after
Hope you guys have enjoyed reading this tutorial.


